Here's my first piece of evidence I do more than just kids clothes! This is a either going to be a birthday or Christmas present for Aviendha...I haven't decided which. She chose the butterfly and helped choose the fabrics so it's a pretty funky butterfly! She hasn't seen it yet, and doesn't even know I had been working on it (phew!) This is SOOOOO easy. BUT, I will tell you the things that will make this even faster/easier.
First: If you don't have a heavy duty sewing machine I don't recommend getting the fleece padding that is completely optional to put between the flannel layers. This will make sewing the pieces together difficult work for your sewing machine! I didn't use it!
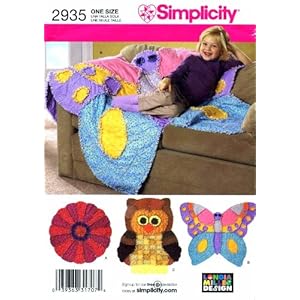
Second: Before you pick out fabric, go over the pattern so that you know which fabrics will be used for what parts of the butterfly. The easiest way to do this is to use a pencil/pen and write the number of the fabric in each section of the picture and then shop for it. The picture on the the front of the pattern only uses 8 different colors instead of the 9 it suggests in the pattern so keep that in mind.
Third: Don't cut the fabric out with right sides together since you're going to be flipping them around to having wrong sides together anyway. Also the markings will be going on the right side so it's a waste of time to cut it out the way they say.
Fourth: They suggest putting the circles on last which ABSOLUTELY stinks because of the bulk of the quilt and trying to sew in tight circles. It's not worth doing those last. Put them on before you sew the rest of the pieces together and you're life will be much easier. The only thing is that you'll have to make sure you don't catch any edges when you are putting it together.
Last: Back stitch all ends when you are sewing pieces together as this is a heavy blanket and just because it's a rag quilt doesn't mean you really want it falling apart =D
One extra tip: When sewing the upper wings together it won't look like the pieces go together but that's because they need to make a curve. So you need to do a little easing around and pinning, but they will fit nicely!
Here is the finished product (the picture doesn't do the colors justice!)

On my 1-10 scale I'm rating this a 3 because of the curves that some people might not be accustomed to working with.
This comment has been removed by the author.
ReplyDeleteThanks for the help. I'm trying to put one together and it's driving me crazy because the pieces weren't matching up.
ReplyDeleteI got this pattern and I am really not big on using patterns so I'm a bit confused. It's telling me to sew rights sides together with the flannel inside. How is that going to work? And how do you end up with the fringed edges if you do that?
ReplyDeleteI learn better by watching and doing then by reading or hearing, so if there is a video to show me the first steps that would be so great.
ReplyDeleteI inherited this pattern (owl) from my late sister through my brother in law. She had already cut the pieces and the batting, but the pattern directions are awful!
ReplyDelete