Just an update on the current status of my sewing life and the lack of posts:
Ugh. I have so many things to post and more projects to do but haven't been able to do much in the last couple of weeks. I haven't been on bed rest, but I have been advised to not do much for a bit because I've been having A LOT of contractions. I've been doing waaaay too much. At my last NST (non-stress test) I was having contractions 5-7 min apart even after spending a week chilling out. Drinking a ton of water and just sitting have lessened it a little.
Last night my sister helped me tie the last quilt of the 3 I've been working on and I'm paying for it today so I will have to wait a couple of days before attempting another sewing project! I have 3 tutus, 2 more quilts, and one other project I finished that's escaping my pregnant brain right now that need to be posted. Hopefully I can get these posted up here in the next several days after I get some help setting them up in some decent light for pictures...the house is so dark! I wish I had some more lamps... Time is just going by too quickly and I have 8 more projects that I really want done here in the next few weeks! Fortunately most of them will require minimal movement.
Anyhow, we'll see what I can do with 3-4 appointments per week till this baby comes (thankfully not all for me) and the ability to do them without getting down on the floor or walking around a bunch. Who knows, maybe I can bribe my sister into cutting them out so that all I have to do is sew them together!
Wish me luck!
Thursday, November 10, 2011
Saturday, October 22, 2011
Christmas Tree
So life happened and things have been busy these last few days. I haven't even had time to sew (Gasp!) But, here it is, the long awaited Christmas tree centerpiece that I've had done for a while now. I have so many other projects to post it's just sad. I took this picture really fast last night so it's pretty blah...

I love how lopsided this turned out! I'm going to add some little balls on there for some ornaments and a star later if I get a chance. Overall, easy breezy and a piece of cake. Total time for this was probably 45 minutes...
There are variations of this type of stuffed tree in Simplicity and McCall's patterns that are just as simple, if not more so!
I think just about anyone could do this!
Monday, October 17, 2011
Wow, I've been busy!
So I've been caught up in several projects at once. I've completed a few but haven't gotten around to posting them yet...I have 4 I need to put up on here so I'll do my best to get those up here over the week. But for now, more good news!
This week at JoAnn's you can get 60% off Cozy flannel solids and Snuggle Flannel prints if you dare to make one of those flannel blankets I put up a few weeks ago. McCall's patterns are also only $.99 this week! If you don't like sewing clothes they always have craft patterns toward the back of the books. If you're into quilting their fat quarters are also only $.99. Which reminds me, I have a super easy quilt I just made for Tekara with fat quarters and some stuff I had from my own stash that I will be posting soon with instructions!!! If you have been wanting to get into quilting all of their rotary cutting tools and mats are 40% off. Their Blizzard Fleece is also on sale for 60% off. And also worth mentioning I think is that their entire stock of thread is 50% off! Here is a portion of their ad online: Moonlight Madness
Look for the Christmas Tree centerpiece I sewed from my Mom's fabric stash tomorrow!
Monday, October 10, 2011
Queen of Diamonds Quilt

This is called Queen of Diamonds, a quilt I've been planning to make for Aviendha since just before Gage was born. I had even bought and began cutting the fabric days before I had him! It took me just over a week to make this with all the cutting and piecing and children to take care of. It does not have the batting or backing on yet because I still need to go out and buy the batting for it. Aviendha isn't aware it's for her but she loves it so it'll be a nice surprise for her birthday or Christmas. Please forgive the wrinkles as it's been folded up for a week now waiting for backing and binding.
The next couple of quilts I make will be MUCH simpler/faster because I can only do so many intensive projects in a row! The boarder on this is my favorite part. It was extremely easy and is fun to look at! Unfortunately it's yucky outside and we have only one weak lamp (as the other 3 have been broken in the last year "We just can't have nice things!") and light from the windows so the pictures aren't the greatest...
Here's a close up:

I got this pattern from a book so I'm not sure if you can find it online or not. I tried searching for it but couldn't find it. The book I got the pattern from is called "Dealer's Choice" which you can find HERE for the cheapest price. This has a lot of good patterns in it of which I made this as well:

These are both definitely projects for a little more experienced sewer/quilter than a straight-up beginner. They also takes a lot of patience!!!
For the amount of knowledge and experience required to put this together without any frustration I'd rate this a 7 or 8.
Friday, October 7, 2011
Pattern Sale!!!
There is a sale on Simplicity Patterns for $.99 from today until the 10th at JoAnn. From the 13th till the 15th Butterick patterns will be on sale for $1.99. Just thought I'd throw that out to the void to anyone who likes patterns, and likes them cheap!
Also Tulle is on sale so you can pick some up to make some tutus!!!
Also Tulle is on sale so you can pick some up to make some tutus!!!
Monday, October 3, 2011
Simplicity 4842 Christmas Stockings
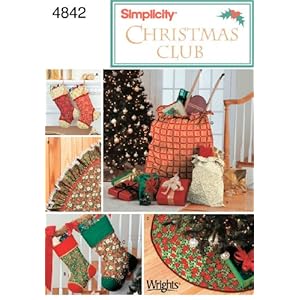
So, finally I have time to post something. This weekend was busy! I have a couple of things to buy to finish 2 of my latest projects so hopefully those will be coming up in the next couple of days. Until then I'm going to talk about the stockings I made a year ago.
I never did get a chance to post them before Christmas last year on my regular blog because I was having some serious tonsil issues!!! I'm excited to show them now because they turned out better than I expected.
I really love this pattern style because they just felt more classy than some of the other stuff available. There are 3 sizes. The small ones are actually quite small. The medium ones are bigger than I anticipated but not nearly as big as the large ones which I would classify as ginormous because of how ridiculously huge the pattern pieces are! Anyhow, I did the medium size ones.
I think they used cotton on the stockings in the picture and they tell you to get this special jingle bell trim of which I did neither. I ended up using brocade and some trim that I thought went better with it. The brocade looks very nice and elegant but I don't recommend it unless you can get it super cheap (it's expensive!) and if you're ok working fabric that unravels VERY easily. If I can find it cheap enough this year I'm hoping to make a tree skirt to match them but we'll see.
Over all the pattern was very simple and easy to follow. I can't remember any instructions that would give anyone trouble and I also plan on using it again to make stockings for additions to the family.
Here is my work which the picture doesn't do justice for:

I haven't decided yet if I'm going to put names or initials on, or if I'm just going to randomly assign one each year. The first 3 are for the kids and Tekara and the last 2 are for Mom and Dad.
I'm rating this a 2 or 3 on the scale depending on what fabric you decide to use!
Tuesday, September 27, 2011
Up and Coming!
I know that normally I can whip out projects every day or two but the one I'm working on now is EXTREMELY tedious. Not hard, just tedious and time consuming, which I don't have much of! I have to work on this thing when Gage takes his naps and when I'm not doing something with/for Aviendha. However, I'm enjoying how it's coming together!
In the mean time I'll tell you about what I found. I've been thinking ahead to the Christmas projects I want to do for decorating and what my current options for fabric are. After my Mom died I obtained a box of Christmas fabric from her sewing room. Fabric that hasn't been touched in almost 20 years!

Now I'll admit, there's some dang ugly fabric in this box!!! Most of it is OK though, and some of it is actually really pretty. It doesn't look like much but it's been sitting for a long time in this container and has had time to compact quite thoroughly. I unfolded about a quarter of this thing and had enough to fill our front loading washer! There is A LOT! Anyhow, as I was looking through it all I stumbled across this:

This is a pattern with all the pieces and instructions right on the material. All you have to do is cut out the pieces and sew it together! It makes a tree centerpiece:

I don't know if this was more common back in the day because I haven't seen anything like this currently. Either way I've decided, what the heck, I'll put it together. I'll be sure to post the final product when I'm done! Don't look for this for a few days to a week as I'm not sure how long it's going to take me to finish my current project...
I'll be posting the stockings I made last year in a couple of days!!!
Saturday, September 24, 2011
Simplicity 2935 Flower
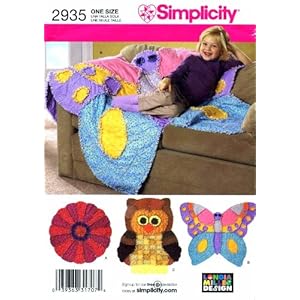
Yep, I revisited this pattern! I made the flower this time for baby #3 and probably won't be doing another rag quilt for quite sometime!
My same bonus advice goes for this one as with the other two except this one is MUCH faster. Either that or I've got it down to efficiency art. But truly the sewing on this is incredibly simple and fast. There also isn't a whole lot of marking either.
Only two of the colors I used were purchased just for this, the rest were left-overs from the other ones I made. I have to say, using brighter colors makes the design much more appealing than the ones they put on the pattern example.
This a fun, easy, and cute design for any girl big or small!
Here's my version where you can't see that the white fabric actually has small pink polka dots. Also I used 3 colors for the petals instead of 2.

This is a 2 on the difficulty scale.
Wednesday, September 21, 2011
Easy Tutu Tutorial
Want to make something without a sewing machine? Here is a tutorial for making tutus for little girls that only requires cutting! This is the most straight-forward video on the basics but you can never get too creative. Add ribbon in with the tulle, flowers, beads, etc. This is probably a 0 on my 1-10 scale for difficulty! ANYONE can make this and it's super cute!
I'm going to do this once I get some of my other projects out of the way. Why haven't I done this before? Because other people have bought my little girl tutus in the past that she still wears. They're getting pretty beat up though and not as cute as anything I know I could custom make for her so I'm excited to make a variety of them (sew and no-sew alike) for Halloween, her birthday, and Christmas. Tulle is VERY cheap so if you have a little girl, feel free to go crazy!!!
I'm going to do this once I get some of my other projects out of the way. Why haven't I done this before? Because other people have bought my little girl tutus in the past that she still wears. They're getting pretty beat up though and not as cute as anything I know I could custom make for her so I'm excited to make a variety of them (sew and no-sew alike) for Halloween, her birthday, and Christmas. Tulle is VERY cheap so if you have a little girl, feel free to go crazy!!!
Simplicity 2493 Turtle
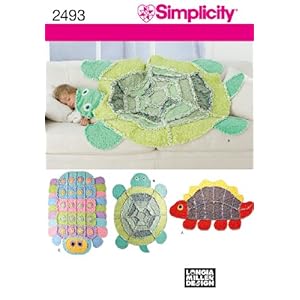
Here is another rag quilt I made for Gage for Christmas. I did the turtle which is supremely easy and totally adorable! I'm going to include here some of the advice I gave on the butterfly rag quilt with one added piece of information I forgot on the other one.
The added piece of information is that some marking tools will be difficult to use (not work very well) on the flannel. Test out out how easily it marks on a scrap of flannel. I found my pencils were terrible but my marking pen worked wonders!
First: If you don't have a heavy duty sewing machine I don't recommend getting the fleece padding that is completely optional to put between the flannel layers. This will make sewing the pieces together difficult work for your sewing machine! I didn't use it!
Second: Before you pick out fabric, go over the pattern so that you know which fabrics will be used for what parts of the butterfly. The easiest way to do this is to use a pencil/pen and write the number of the fabric in each section of the picture and then shop for it.
Third: Don't cut the fabric out with right sides together since you're going to be flipping them around to having wrong sides together anyway. Also the markings will be going on the right side so it's a waste of time to cut it out the way they say.
Fourth: They suggest putting the eyes on last which ABSOLUTELY stinks because of the bulk of the quilt and trying to sew in tight circles. It's not worth doing those last. Put them on before you sew the rest of the pieces together and you're life will be much easier.
Last: Back stitch all ends when you are sewing pieces together as this is a heavy blanket and just because it's a rag quilt doesn't mean you really want it falling apart =D
Here is my finished product that I had trouble tacking up straight....:

This is definitely a 2!
Here is my finished product that I had trouble tacking up straight....:

This is definitely a 2!
Thursday, September 15, 2011
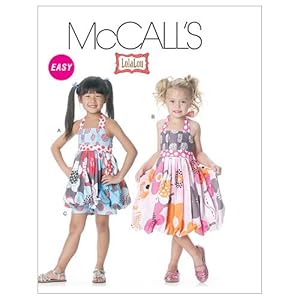
McCall's 6066 Circle Skirt

I love this pattern and plan on making it again sometime in the future. I've made both D and F. The one on the far right is the one I'll show but they are all equally easy. The only thing that's even kind of tricky is sewing the hem which requires some easing because of the curves. Other than that, this skirt is pretty much cake!
Instead of doing a giant flower or nothing, I put on a little butterfly on the loop that pulls the skirt up. You also can't tell but the fabric on top as some minor sparkles on it that make it extra girly!

I'm giving this a 2! Easy and super cute!
Tuesday, September 13, 2011
Charming Baby Pinwheel

This is the baby quilt I decided to do for the 3rd one coming up. All I can say is that they better be right that it's a girl because I'm soooooo in love with this pattern! I like mine better too...HA!
What can I say about this except that it was SOOOOOO easy! I put this together in just a couple of hours. The little pinwheels are prairie points that are loose. You can buy a couple of charm packs with 5"X5" squares already cut and matched for you. The only thing you'd have to do after that is cut out another 24 squares of one color to go behind the pinwheels and the boarder fabrics. If anyone is interested in this I can put up some instructions.
Here is my version:

On a scale of 1-10, this is a 2. Super easy!
Simplicity 2935 Rag Butterfly
Here's my first piece of evidence I do more than just kids clothes! This is a either going to be a birthday or Christmas present for Aviendha...I haven't decided which. She chose the butterfly and helped choose the fabrics so it's a pretty funky butterfly! She hasn't seen it yet, and doesn't even know I had been working on it (phew!) This is SOOOOO easy. BUT, I will tell you the things that will make this even faster/easier.
First: If you don't have a heavy duty sewing machine I don't recommend getting the fleece padding that is completely optional to put between the flannel layers. This will make sewing the pieces together difficult work for your sewing machine! I didn't use it!
Second: Before you pick out fabric, go over the pattern so that you know which fabrics will be used for what parts of the butterfly. The easiest way to do this is to use a pencil/pen and write the number of the fabric in each section of the picture and then shop for it. The picture on the the front of the pattern only uses 8 different colors instead of the 9 it suggests in the pattern so keep that in mind.
Third: Don't cut the fabric out with right sides together since you're going to be flipping them around to having wrong sides together anyway. Also the markings will be going on the right side so it's a waste of time to cut it out the way they say.
Fourth: They suggest putting the circles on last which ABSOLUTELY stinks because of the bulk of the quilt and trying to sew in tight circles. It's not worth doing those last. Put them on before you sew the rest of the pieces together and you're life will be much easier. The only thing is that you'll have to make sure you don't catch any edges when you are putting it together.
Last: Back stitch all ends when you are sewing pieces together as this is a heavy blanket and just because it's a rag quilt doesn't mean you really want it falling apart =D
One extra tip: When sewing the upper wings together it won't look like the pieces go together but that's because they need to make a curve. So you need to do a little easing around and pinning, but they will fit nicely!
Here is the finished product (the picture doesn't do the colors justice!)

On my 1-10 scale I'm rating this a 3 because of the curves that some people might not be accustomed to working with.
Simplicity 3588 Dress
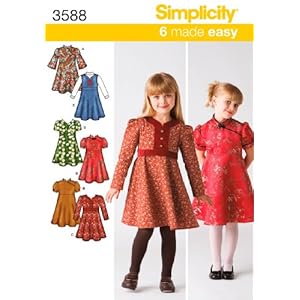
The colors in this picture are a little saturated but...oh well. I did dress B. This is a super cute dress! However, if I do it again I will be lengthening it because my daughter has long legs and this dress came off a little short on her. There is a zipper and the collar combined with the piece that comes across the side can be tricky. Also there is piping which you'll need a zipper foot for (as well as for the zipper). It's not terribly difficult but there are more elements here which you would need to be at least an average sewer to be able to be ok making this.
Here is Aviendha once again and the angle isn't great because you can't see that this dress actually comes about and inch or two above her knees. The collar isn't as high as it looks either.

At the end of the day I'm rating this a 5 1/2 in difficulty.
Monday, September 12, 2011
McCall's 6016 Boys Collared Shirt

This is the first boy's pattern I've done, and also the first collared shirt which happened to be "C" on this pattern, the one the boy is wearing. I, however, did not use contrasting fabric for the cuffs. What can i say about this shirt.... The collar was surprisingly the easy part compared to putting the arms in. The instructions weren't hard, the hard part was easing the fabric in, and then sewing around that tiny hole. It took a little bit of time to get it all where it needed to be. I imagine that a men's version would be easier because you are not sewing in cramped quarters. Someone who is not experienced might get a little frustrated. Other than that, the rest is pretty simple.
Here it is modeled by my Gage:

So what would I rate this? Probably a 6 on the shirts for putting on the sleeves alone. Everything else would be about a 4.
McCall's 6271 Updated Bubble Dress
This is a fun and cute pattern! I did dress "B". Overall the pattern is fairly simple. There is gathering when attaching the skirt to the bodice and also the bottom of the skirt to the underskirt. If you don't have issues gathering then it shouldn't be a problem. It also has pleats in the front. One flaw I think is that the band that goes across the waist should be tacked down as opposed to loose because it tends to climb up. It was easy to fix by slip stitching it down from the inside so that it sits neatly above the skirt line.
Here it is, modeled once again by my Aviendha in poor lighting:

And here is the back:

Overall, I love the style of this dress (as well as Aviendha!)
On my 1-10 scale I'm going to give it a 3 or a 4...haven't decided yet.
Simplicity 2431 (Daisy Kingdom)
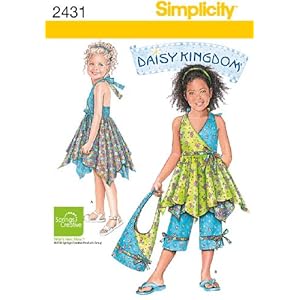
Here is the first project I'm sharing! I made "A" which is the dress to the left. Some things about this? It was actually pretty simple all in all. The most tedious part was ironing out the ties that go around the neck. It's a very straight-forward pattern. If I could give advice to the beginner? Make sure you copy the lines for the elastic on the RIGHT side of the fabric when cutting it out from the pattern piece. Often times patterns won't tell you which side to make the markings on so that you can see them when you are putting it together.
Here is the finished product modeled by my sweet Aviendha in a poorly lit area because I was too lazy to try to do something cute outside!

Did I mention it's her new favorite dress?!
On a scale of 1-10 (1 being the easiest, 10 being the hardest): With the beginner in mind I'd say this is a 3.
Yay For Sewing!!!
Here I am starting another blog when I don't add much to my other one as it is. Ha! Anyhow, I do so many sewing projects I decided this would be the best place to talk about them and give tips and advice should anyone ever try them. I also take suggestions from other people so if there's something you want to see done but are too chicken to try it, let me know! Once in a while I might put up a non-sewing project because those occasionally interest me. Sew, here goes nothing! (Ha ha, lame! I know!)
Subscribe to:
Posts (Atom)